In my last post on this subject (which was a while ago), I walked readers through how to set up the different types of Google Alerts. In this post, I’ll focus on Scoop.it.
Scoop.it offers social curation on the web for free (for their most basic package). Power users may want to upgrade to have more topics and posts available. To set up an account, simply go to http://www.scoop.it/ and click the “Join Free” button in the top right corner of the screen. Most people already have a Facebook or Twitter account (at least those interested in social curation) and, by using one of these, it makes sign-up a breeze.
In the example, I used the ILC’s Twitter account to sign up.
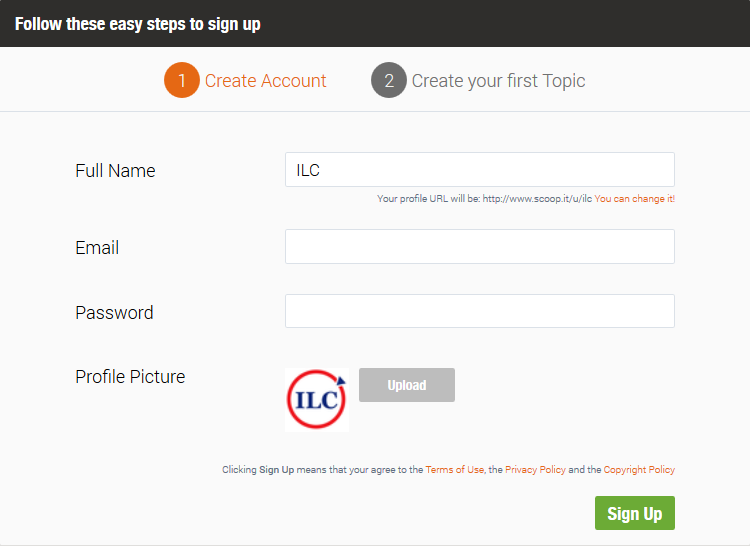
I’ll simply fill in the email and desired password. The profile picture is already pulled from the Twitter account but it can be changed, if desired.
The next step is to choose the topic you want to curate. Give your “paper” a name (this will show as the title of your page of “scoops.”) List keywords or phrases (separated by commas) that are connected to your topic. Scoop.it will search the web and social media sites to pull in posts with those keywords/phrases.
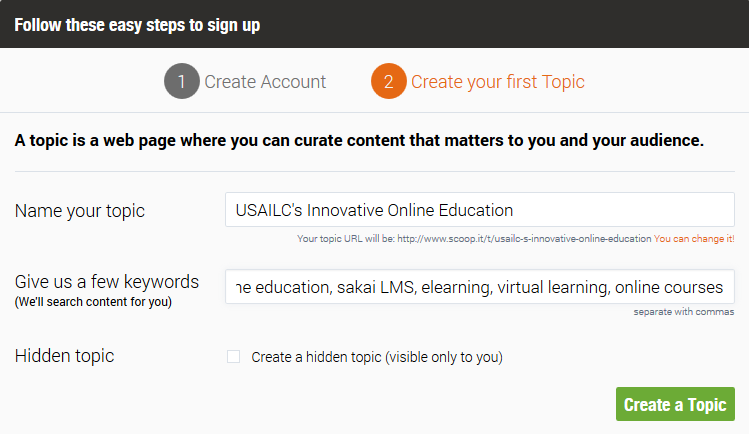
Click the “Create a Topic” button.
The next screen will offer a bookmarklet. Don’t forget to drag and drop it into your bookmark bar on your browser!
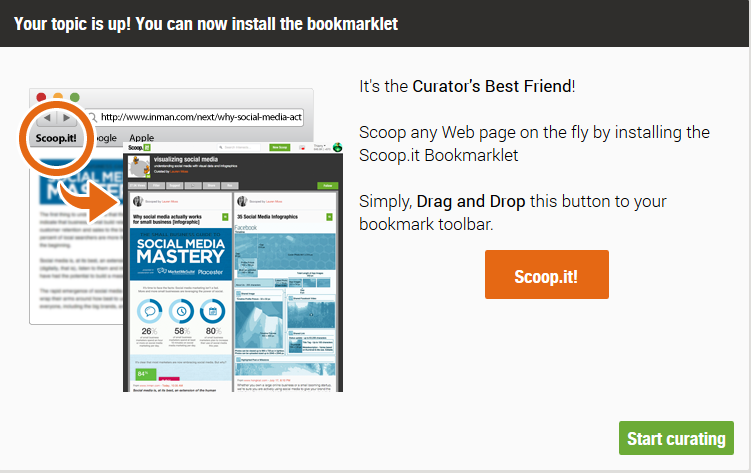
Once the bookmarklet is in your browser’s bookmark bar, you’re ready to start curating your topic! Click the “Start Curating” button and get ready to dig in!
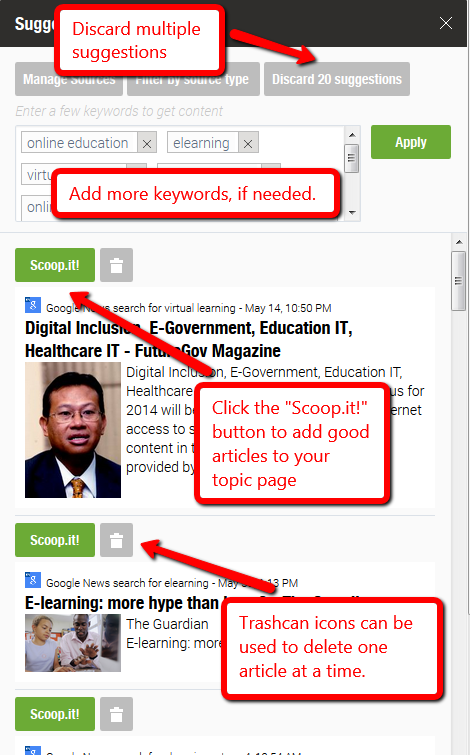
The next screen should be your topic page and you’ll see a list of suggestions to include on the right.
Click the title of the article to access it on the web and peruse it. If it’s something you’d like to include, click the “Scoop.it” button. If not, you can click the trash can icon to delete it. Scanned through and nothing looks promising? Click the “Discard Suggestions” button at the top of the list to delete multiple suggestions. You can also add more keywords and phrases as needed by clicking and typing into the keyword box and clicking the “Apply” button.
Once you’ve chosen to “Scoop.it” on a selection, you’ll get a pop-up box.
At the top of the pop-up is the name of the selection and a blurb about how it appeared on the web (i.e. social network posting). Beneath this is an area that you can add your thoughts—for example, were there points in the article that you found particularly interesting or things you disagreed with? (This is optional but it does give you more of a presence within your curated topic.) Near the bottom are icons for the various social networks that you can link to via Scoop.it. Right now, in my example, I only have Twitter connected as that was what I used to create this Scoop.it account. I can easily add more by clicking the “Add More” button and entering the necessary information.
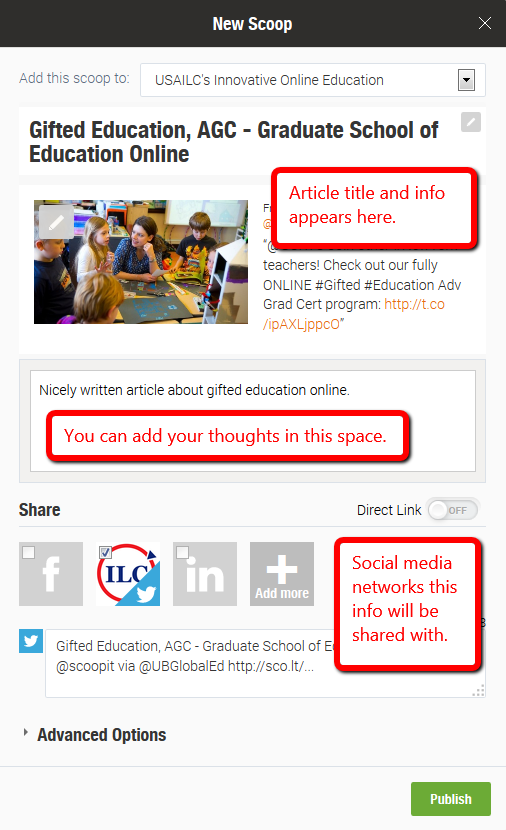
Why would you want to connect networks? It’s simple. By adding your Facebook, Twitter, and LinkedIn accounts to Scoop.it, you can easily share information and articles on your topic throughout your social media networks, just by making sure the boxes are selected whenever you publish a new “Scoop.” Once you’re satisfied with the “Scoop,” click “Publish” and it will appear on your page.
Continue through the suggestions, adding those you find valuable. Once done, simply click the “Discard Suggestions” to get rid of all of the old suggestions so you can start fresh tomorrow (or whenever you return).
One of the nice things about Scoop.it is that you can do it as often or as little as you want. Your suggestions will simply keep in your suggestions stream until you’re ready. That said, regular curating and sending new and interesting articles out to your social media networks (and hosting them on your page) will grow your network of followers. Better yet, these new followers tend to be interested in the same topic(s) you are!
Now we circle back around to talk about Google Alerts and how to use them with Scoop.it.
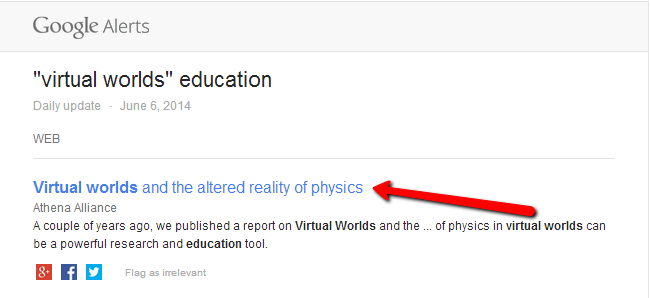
If you have Google Alerts set for your topic, you’re probably getting a lot of articles into your email inbox. To get these into your Scoop.it page, simply click on the title of the article in your email.
Remember the Scoop.it bookmarklet we added to our bookmark toolbar? Once the webpage opens, we’re going to click on the bookmarklet icon.
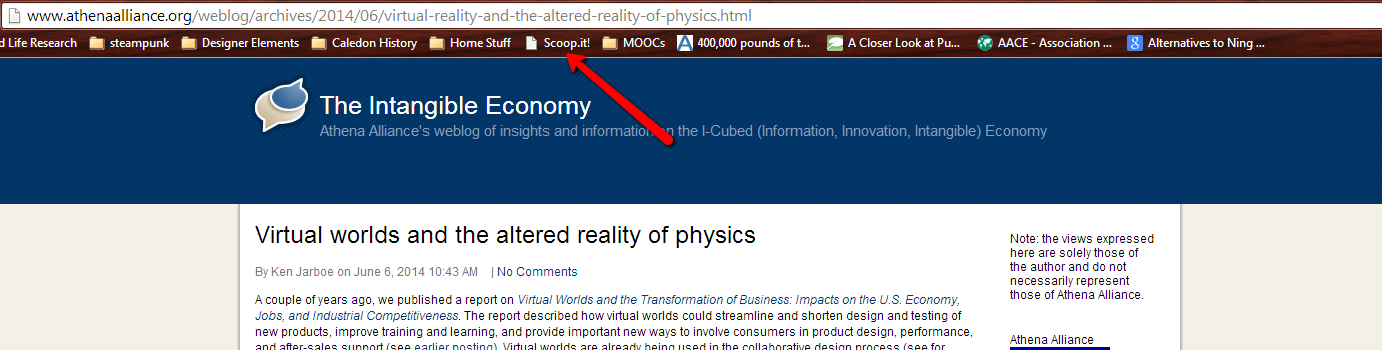
This opens a pop-up window just like the one you had earlier when selecting a “Scoop” from your suggestions list. Even without having Scoop.it open, clicking the “Publish” button will send it to your topic page and to your social media networks (if desired).
Congrats! You’re well on your way to being a social curation guru! In the next part of the series, I’ll show how to use Paper.li to send out regular online curated “papers” on your topic to your social media followers and networks.
